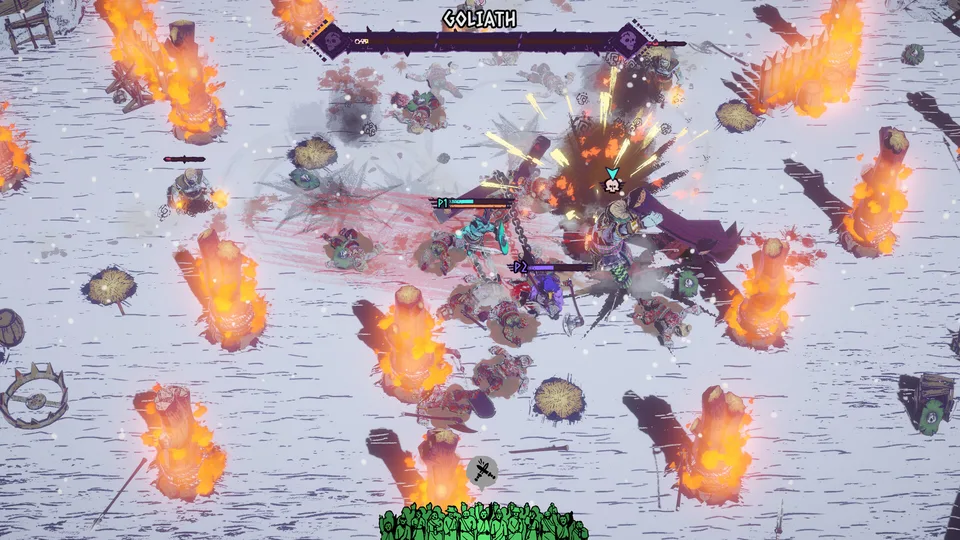
Discover the best chained beasts builds and survival tips. Get the latest strategies for Featherweight Games' rogue-like title today.
Published: Chained Beasts Wiki Editorial Team
Table of Contents
Introduction to Arena Combat and Synergy
Stepping into the blood-soaked sand of Featherweight Games' newly launched title requires more than just raw courage; it demands a deep understanding of tactical synergies. If you want to survive your sentence in the colosseum, mastering optimal chained beasts builds is your ultimate ticket to freedom. Without a solid plan, you will quickly become floor decoration while enemy hordes overrun your position.
In this comprehensive guide, we examine how to configure your gladiator effectively. Whether you are tackling the solo experience or coordinating with teammates, optimizing your loadout changes everything. You can review the official game details directly on the Chained Beasts Steam Store Page. Let us dive into the mechanics, weapon choices, and strategic approaches that elevate your arena performance.
Understanding the Core Mechanics of Your Loadout
Every successful run begins with an appreciation of your physical limitations and offensive tools. As a gladiator fighting for your life, your kit is heavily influenced by the defining gimmick of the experience: the heavy chain shackled to your ankle. When configuring your chained beasts builds, you must factor in how this tether restricts your movement while offering unique combat opportunities.
According to player experience reports, solo players receive a heavy ballast stone attached to their chain. While it lacks the unpredictable nature of a human teammate, it functions as a reliable anchor for swinging mechanics. The twin-stick combat system allows you to launch throwables and lob your primary weapon using precise trajectory markers.
Solo Ballast Configuration
In solo runs, your chain terminates in a heavy rock. This configuration provides predictable physics and acts as a secondary defensive perimeter, though it demands careful corner management around arena pillars.
Cooperative Link Setup
When playing with up to four players in local co-op, team synchronization becomes vital. Players must coordinate their movement to avoid snagging teammates on environmental hazards while maximizing collective crowd control.
Managing the physical space of the arena is just as important as your damage output. Community reports indicate that swinging your heavy weapon too close to stone pillars can easily ruin your positioning, turning a clean escape route into a frustrating snag.
Essential Gear and Perk Combinations
Choosing the right equipment dictates how long you will endure the brutal waves of enemy combatants. As you clear rounds, you will earn currency to purchase upgrades, along with automated leveling perks that grant critical buffs and debuffs. Experimenting with different chained beasts builds highlights how defensive utility often outweighs pure offensive scaling.
Equipment Type
Primary Function
Tactical Advantage
Player Feedback
Shield Spikes
Defensive Retaliation
Attackers take damage when you block incoming strikes.
Highly recommended for close-quarters crowd management.
Heavy Chain
Crowd Control & Trip
Hooks enemies and trips foot soldiers to the ground.
Requires practice to avoid catching on arena pillars.
Throwable Objects
Ranged Pressure
Lobs environmental debris using trajectory targeting.
Great for triggering specific crowd quota challenges.
According to community feedback, failing to utilize the chain for offensive tripping severely limits your survivability. By tripping rushing opponents, you create safe windows for devastating backstabs and swift kills. Stacking perks that increase vigor and bonus damage from these brutal tactics transforms a standard defensive run into an unstoppable offensive engine.
Tip
Watch Your Environment: The colosseum floor is littered with hazards and corpses. Certain traits, such as a fear of blood, can temporarily impair your vision near fallen foes. Position your fights away from dense piles of bodies to maintain clear sightlines during frantic boss encounters.
Surviving Boss Encounters and Advanced Encounters
As your run progresses toward higher days, the challenges escalate drastically. Developing reliable chained beasts builds is tested to its absolute limit when facing elite enemies and mounted commanders like Beastmaster Barka. According to community insights from early playtests, these late-stage encounters introduce complex multi-target dynamics that punish sloppy positioning.
When facing mounted bosses, staying off the direct charge line is paramount. Your chain can be dragged through enemy formations to deal passive area-of-effect disruption while you focus on dodging primary attacks.
Establish Spacing: Maintain a wide orbit around boss entities to avoid their initial high-speed charge animations.
Deploy Crowd Control: Use your chain to trip minor minions, clearing a safe zone for targeted strikes against the primary threat.
Capitalize on Staggers: When an elite enemy or boss falls to the ground from a successful trip or heavy blow, unleash your stored throwables and charged melee attacks.
Manage Crowd Demands: Balance your survival priorities carefully against optional audience quotas to avoid taking unnecessary damage for minor rewards.
To help you plan your progression, the table below outlines typical difficulty milestones and recommended strategic adjustments during a standard run.
Run Milestone
Primary Threat
Recommended Strategy
Risk Factor
Days 1–2
Basic Foot Soldiers
Focus on basic swings and learning chain physics.
Low - Good for gathering initial coin.
Days 3–4
Armored Elites
Prioritize shield spikes and defensive blocking.
Moderate - Crowd density increases.
Final Gate
Beastmaster Barka
Continuous movement, isolate boss from minions.
High - High damage output and tight arenas.
Conclusion
Mastering your strategy in Featherweight Games' brutal colosseum requires patience, spatial awareness, and smart loadout choices. By refining your approach to weapon selection, environmental hazards, and chain manipulation, you can consistently push past difficult arena milestones. Whether you are experimenting with solo tactics or preparing for cooperative chaos, these chained beasts builds will give you the edge needed to earn your ultimate freedom.
What are the best chained beasts builds for solo players?
Solo players benefit greatly from loadouts that prioritize defensive retaliation, such as shield spikes, combined with active use of the heavy chain to trip incoming foot soldiers for safe backstabs.
Can I play Chained Beasts with friends?
Yes, the game supports local co-op for up to four players, allowing friends to link together via chains and coordinate their movement and attacks against arena waves.
How do I handle environmental obstacles while chained?
Maintaining situational awareness is critical. Practice swinging your weapon and managing your positioning away from stone pillars to prevent your chain from snagging at crucial moments.
Where can I find official updates about the game?
You can check out official announcements, developer logs, and platform details directly by visiting the Steam store page for Featherweight Games' project.