Mastering Chained Beasts Block Timing for Survival
Improve your survival rate in Chained Beasts block timing. Discover essential combat strategies, parry windows, and co-op tactical tips.
Published: Chained Beasts Wiki Editorial Team
Table of Contents
Introduction to Arena Survival and Defensive Mechanics
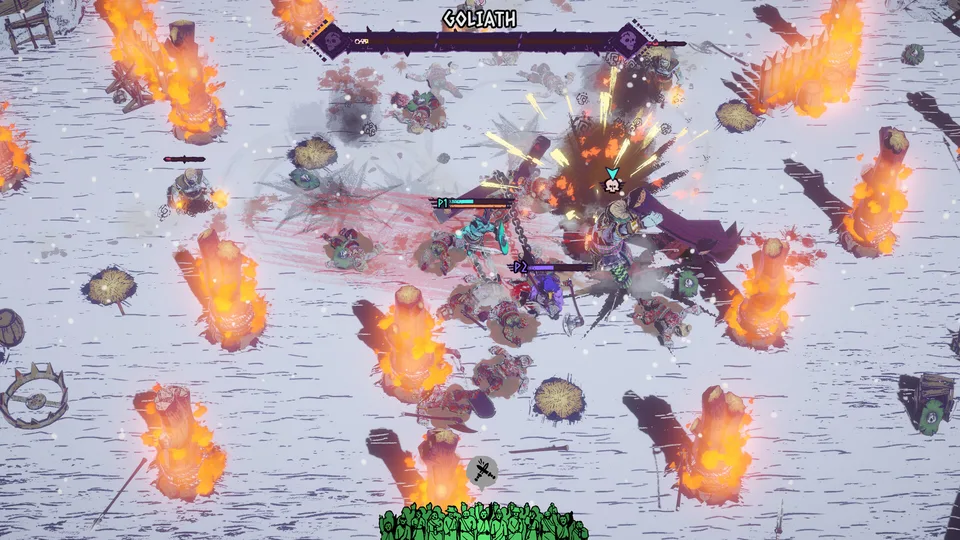
Entering the blood-soaked arenas of Featherweight Games' latest hit requires more than raw aggression; mastering chained beasts block timing can mean the difference between glorious victory and an ignominious defeat. When you are physically tethered to your allies while fighting off waves of ruthless adversaries, every defensive move demands absolute synchronization. This guide breaks down the nuances of defensive play, helping you navigate the chaotic physics and punishing difficulty spikes that define this co-op roguelike experience.
Why is this mechanics mastery so crucial to your campaign? Because improper execution triggers severe status afflictions, breaks your vital team chains, and leaves your gladiator vulnerable to devastating backstabs from hostile combatants. By refining your chained beasts block timing, you protect your health pool, maximize your counter-attack windows, and keep the roaring crowd firmly on your side.
Understanding the Rhythm of Combat and Enemy Assaults
Combat in the arena operates on a strict tempo where split-second decisions dictate your survival. Enemies telegraph their strikes through distinct animations, but the presence of physical chains adds an extra layer of complexity to your positioning. According to player experience reports, reacting too early to an incoming attack often leads to unnecessary movement errors, while reacting too late invites overwhelming damage.
To help you visualize how defensive actions interact with various combat scenarios, consider the following breakdown of defensive states and their mechanical implications based on community observations:
Defensive Action
Primary Benefit
Associated Risk
Best Used Against
Shield Block
Mitigates incoming frontal damage
Small movement delay, stamina strain
Rapid projectile volleys
Dodge Roll
Repositions away from dense crowds
Risk of tripping if mistimed
Heavy overhead boss strikes
Parry / Counter
Opens up immediate execution opportunities
Narrow activation window
Standard melee weapon strikes
Mastering the precise rhythm requires observing enemy attack patterns rather than spamming defensive inputs. When playing alongside friends, overlapping inputs can disrupt your partner's positioning, making coordinated rhythm vital for team survival.
Managing Afflictions and the Cost of Defensive Failures
Every mistake in the arena carries a heavy physical and mental toll. When your defensive maneuvers fail—such as blocking or dodging with poor chained beasts block timing—the game's penalty system inflicts debilitating conditions upon your character. These afflictions are designed to test your adaptability under pressure.
The Danger of Tripping
Mistiming your blocks or dodges can cause your gladiator to trip. Player experience notes that melee attacks against tripped enemies are always treated as backstabs, making defensive precision an absolute necessity during chaotic boss encounters.
To better understand how specific afflictions impact your combat effectiveness, review the following risk-reward profile documented by community players:
Affliction Name
Trigger Condition
Direct Gameplay Impact
Mitigation Strategy
Butterfingers
Excessive failed inputs
Higher chance to disarm when missing
Focus on deliberate, timed strikes
Annoying
Standing too close to allies
Allies frequently attack you accidentally
Maintain optimal chain slack
Impulsive
Forced progression choices
Locks in skills and item purchases
Plan your upgrade path carefully
Advanced Co-Op Tactics for Chain-Bound Warriors
Playing with a squad introduces unique collaborative dynamics. Because you are physically bound together, your defensive strategy cannot rely solely on individual reflexes. Your chained beasts block timing must harmonize with your partners' movements to prevent the tether from snapping under sudden tension.
Establish Communication: Call out incoming enemy heavy attacks so your entire linked team prepares to defend simultaneously.
Monitor Chain Tension: Keep an eye on the distance between you and your partners; a taut chain restricts your dodge directions.
Sync Defensive Inputs: Coordinate your blocks to create overlapping defensive walls against tight clusters of aggressive beasts.
Capitalize on Stun Windows: Once a coordinated block successfully halts an enemy, use thrown arena objects or disarmed weapons to maximize damage output.
For those looking to expand their multiplayer library further, the developers have introduced exciting bundles alongside the main release, such as crossovers with Cult of the Lamb, LORT, and Gang Beasts.
Essential Gear and Weapon Synergy for Defensive Play
Surviving the grueling acts of the campaign requires pairing your defensive timing with the right equipment. Quick weapons allow for rapid recovery after a block, while heavier weapons demand absolute commitment to your swings.
Swift Daggers and Swords
Ideal for players who prefer a fast-paced playstyle. They offer minimal recovery frames after a block, allowing you to quickly transition back into movement or defensive stances.
Heavy Shields and Blunt Improvised Gear
Perfect for anchor players who absorb pressure for the team. While they slow down movement speed, they provide reliable damage reduction when timing gets tight.
According to community feedback, utilizing dropped enemy body parts or shields found within the arena drastically improves your crowd control efficiency, turning a defensive stalemate into a decisive offensive push.
Frequently Asked Questions
How does chained beasts block timing affect my health pool?
Properly timed blocks absorb incoming damage without triggering negative afflictions. Conversely, mistimed defensive actions can cause tripping, opening you up to critical backstab damage that rapidly drains your health bar.
Can I play the game completely solo while mastering these mechanics?
Yes, you can experience the campaign and tackle the various difficulty levels as a solo player, though the game is heavily optimized for chaotic 1-4 player co-op experiences.
What causes my gladiator to trip during combat?
Tripping is often the result of executing a dodge or block while suffering from specific physical afflictions or failing to time your defensive inputs correctly against aggressive enemy pressure.
Where can I find more community tips and roadmap updates?
You can join discussions, share run replays, and check out post-launch roadmap details by visiting the official community hub and store page.